


By Overchat Editorial Team — Beauty & Imaging Desk. Expert editorial guide based on the target product workflow and documented capabilities, updated October 2026.
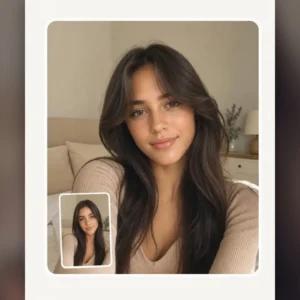
To preview bangs with Overchat AI, use the Bangs Filter page as the entry point, upload a clear portrait and then continue in the AI Hairstyle Generator. The filter page itself does not generate the image: clicking Try bangs opens the web app with bangs already selected, where sign-in and Overchat credits are required.
What you need before you start
Prepare a clear portrait. The better the source, the less the model has to guess. Use a file with clear subject boundaries, normal lighting and enough resolution to inspect the result afterward. If the task involves a person, avoid heavy beauty filters, extreme perspective and motion blur because those can make identity preservation harder.
The goal is a realistic hairstyle preview. Keep that outcome in mind before you upload anything: a result for a quick social post can tolerate more stylization than a planning reference, product image or professional profile. A hairstyle preview is a visual planning aid. Real hair density, texture, cowlicks and a stylist’s technique can change the final result.
How to do it with Overchat AI
Open the dedicated Bangs Filter page. This is the target workflow used throughout the instructions below.
Step 1: Choose the cleanest source
Start with a clear portrait. Pick a source where the relevant subject is visible and not hidden by cropping, glare, compression or foreground objects. If you have several candidates, prefer the image that looks ordinary and representative rather than the most heavily edited one.
Step 2: Open the dedicated Overchat tool
Upload your photo and click Try bangs. Overchat opens its AI Hairstyle Generator with bangs already selected; sign in, and the generation runs there (it uses Overchat credits).
Step 3: Check the source photo
Check that your full head and hairline are visible in the photo before you upload it. Avoid a crop that cuts off the forehead, temples or top of the hair, because those areas determine how the fringe is placed.
Step 4: Generate the first version in Overchat
After the Hairstyle Generator opens with bangs selected, run one generation first. If the result misses, change one factor at a time rather than switching the source and style simultaneously.
Step 5: Inspect the result at full size
Review the bangs at normal size and then zoom in. Check the boundary around the hairline, eyebrows, temples and glasses, and make sure the new fringe follows the direction and texture of the existing hair.
Step 6: Regenerate only if needed
If something is wrong, correct one cause. A cleaner source often helps more than repeated blind generations. Adjust framing, use a better-lit photo or choose a frame with less occlusion, then run the tool again. Stop when the result is credible for the intended use rather than chasing cosmetic changes that introduce new artifacts.
Step 7: Download the final file
Download the result and inspect it at the size where you plan to use it. Look for compression, edge halos or repeated hair texture around the fringe.
Quick workflow checklist
| Step | What to do | What to check |
| 1 | For Bangs Filter, start with a clear portrait. The source should be sharp enough that the model can see the boundaries and identity details relevant to the edit. Avoid screenshots that have already been heavily compressed if you have the original file. | Sharp, well-framed source |
| 2 | Upload your photo, click Try bangs, then sign in when the AI Hairstyle Generator opens with bangs selected. The generation uses Overchat credits. | Correct style selected in the generator |
| 3 | Check that the full head and hairline are visible before generating; then inspect the fringe around eyebrows, temples and glasses. | Hairline and fringe placement |
| 4 | If your first Bangs Filter result is not convincing, change one variable at a time: use a cleaner source image, adjust the framing, or regenerate. Comparing controlled variations is faster than making many unrelated changes at once. | One change per retry |
How to get a better result
Bangs change facial framing rather than simply adding hair. Curtain bangs can visually widen the cheek area, blunt bangs reduce visible forehead height, and wispy fringe has a lighter effect. An AI preview is most useful when you compare several fringe families instead of asking whether ‘bangs’ in general suit you.
The difficult boundary is where new strands cross eyebrows and temples. Check that hair does not merge into eyelashes, glasses or skin, and that the fringe follows the direction and texture of the original hair rather than looking pasted on.
A useful quality rule for Bangs Filter is to check what should not have changed. Background lines, clothing, facial identity, accessories, logos and proportions are strong reference points. When the model changes those areas unnecessarily, the generation may look impressive but it is less trustworthy as a representation of the requested edit.
Also judge the result in context. A realistic hairstyle preview may be viewed on a phone, printed, used as a planning reference or inserted into another creative workflow. Export size, crop and realism should match that destination. A technically larger file is not automatically better if the underlying generation has visible artifacts.
Common mistakes to avoid
- Using a low-resolution or heavily compressed source. The AI can create plausible detail, but it cannot know what the original file never captured.
- Treating the first Bangs Filter result as ground truth. Generative output is probabilistic, so inspect it and rerun when important details are wrong.
- Changing too many variables at once. Controlled iterations make it easier to learn whether framing, source quality or the generated effect caused the problem.
- Ignoring the category limitation: A hairstyle preview is a visual planning aid. Real hair density, texture, cowlicks and a stylist’s technique can change the final result.
Expert tip: compare the preview at normal size and at 100% zoom. Pay most attention to the hairline, brow line and temples, where new fringe is most likely to look pasted on. Keep the original beside the result so you can check that the face and background have not shifted.
Frequently asked questions
Do I need editing experience to use Bangs Filter?
No. The point of the dedicated workflow is to avoid layers, masks and manual retouching. You still need to review the output carefully, but the generation itself is designed for non-editors.
What should I do if the result looks artificial?
Start with the source rather than endlessly regenerating. Use a sharper, more evenly lit file with fewer occlusions, then compare the changed area with the original at full size.
Should I keep the original file?
Yes. Keeping the original makes it easy to confirm exactly what changed and is especially important when AI reconstruction invents visual detail.
Is Overchat AI the only way to do this?
No, but this guide intentionally uses Overchat AI as the direct workflow because the target page is dedicated to the task and does not require building the process inside a general editor.